
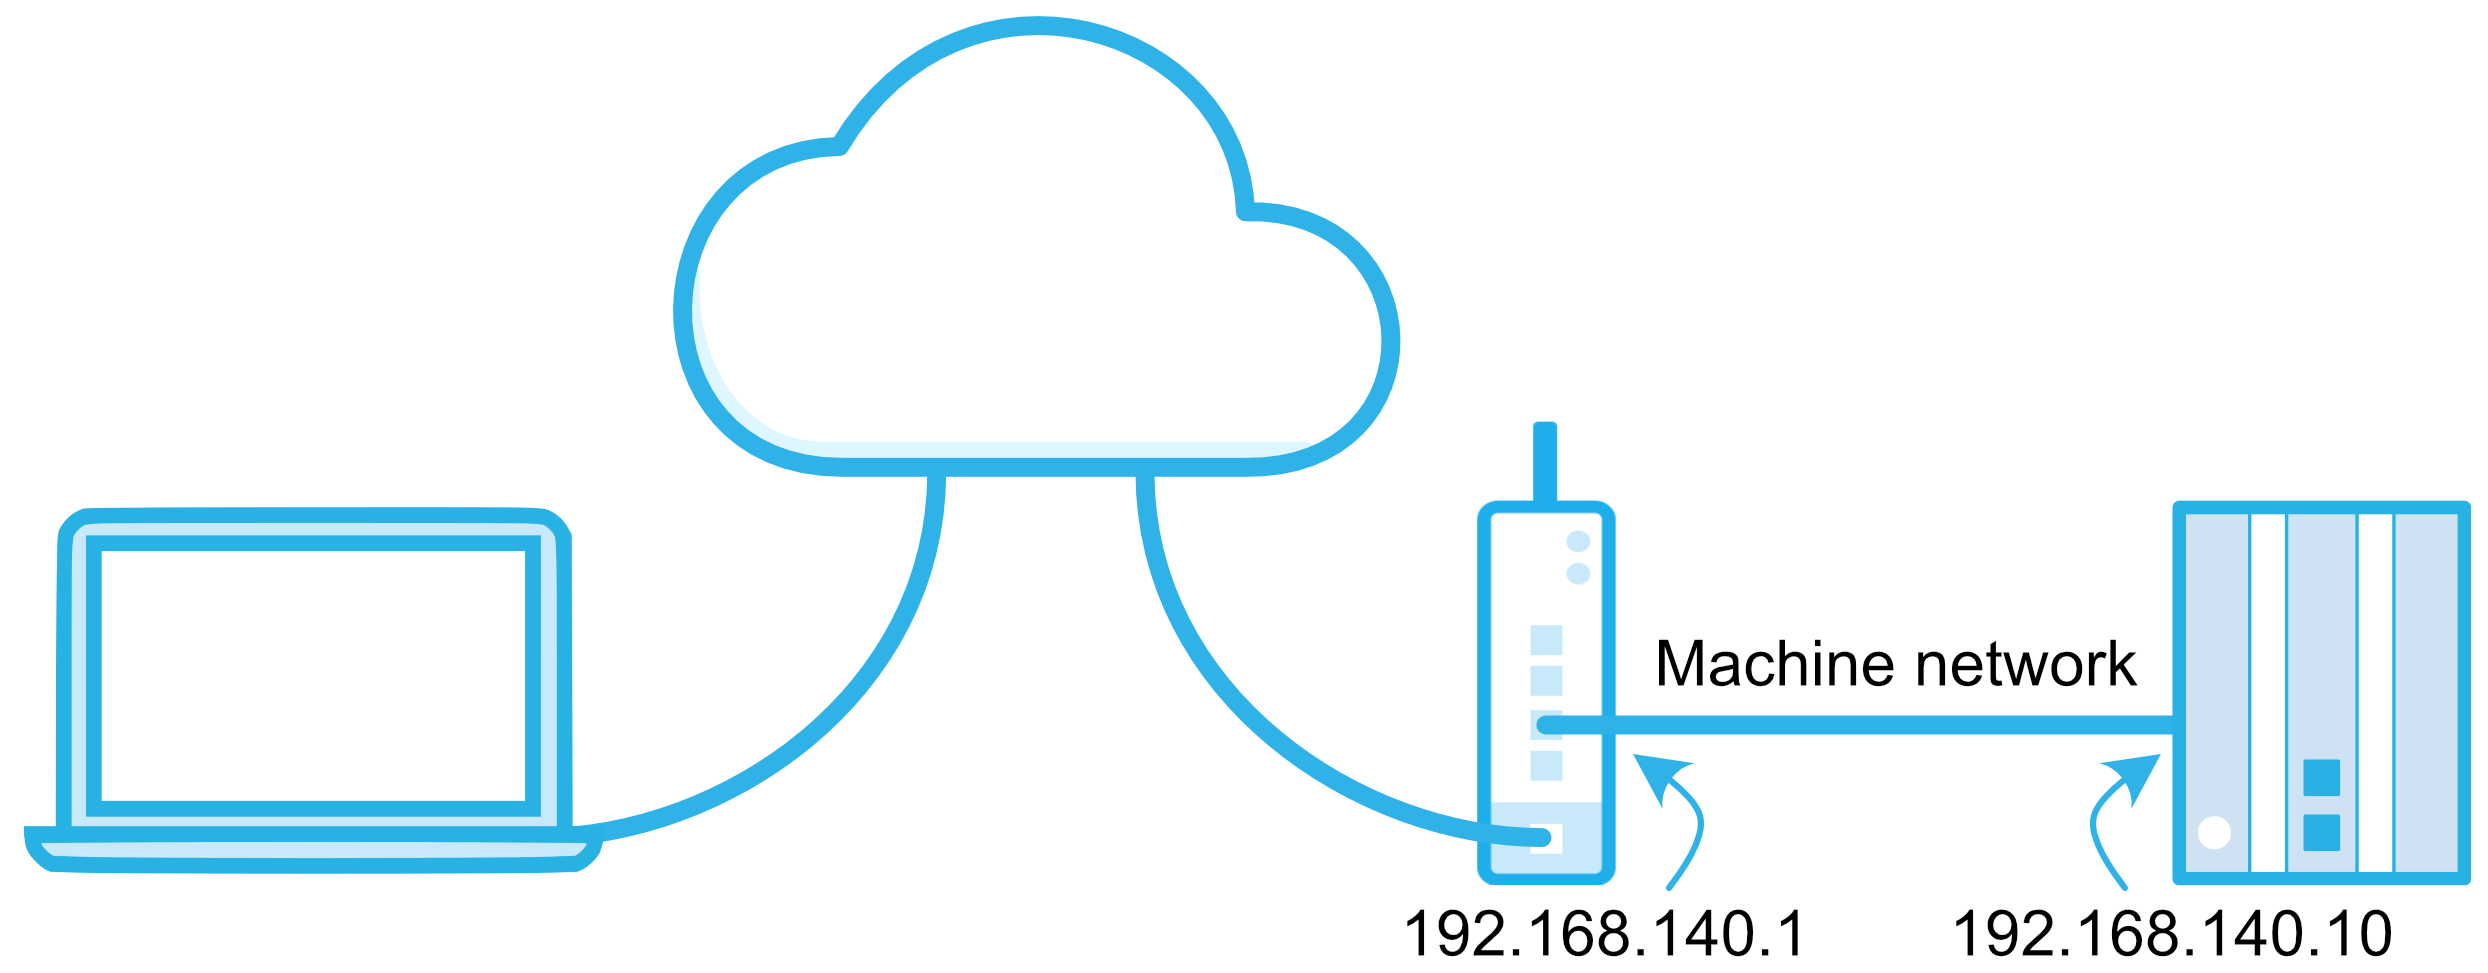
Usually, you can only access one IP range (subnet) remotely, for example:
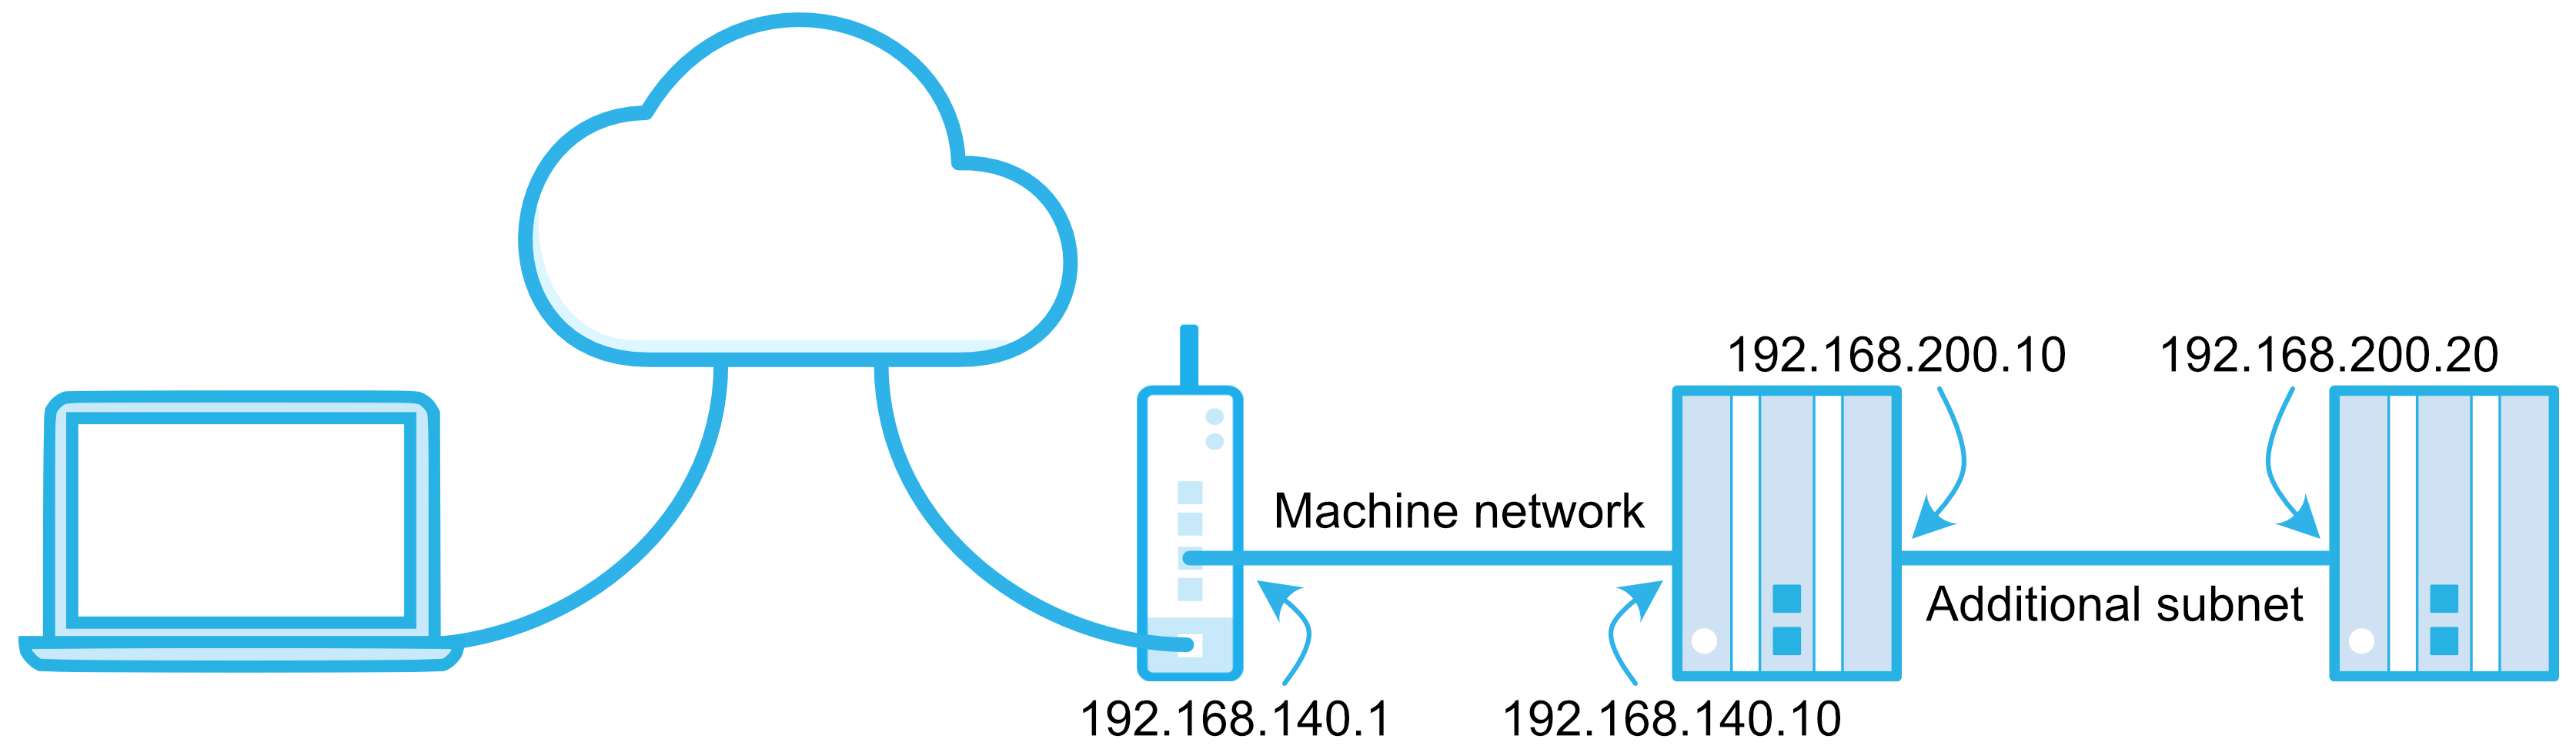
If your hardware (PLC/HMI/etc) meets certain requirements, you may be able to access more than one IP range remotely. It needs to:
- have at least 2 Ethernet ports, each having a different IP range.
- be able to function as a gateway, thus allowing traffic through from one IP range to the other.
If you are unsure whether your machine meets these requirements, please contact the hardware manufacturer. An example of how the network overview may look is shown below.
Add an additional subnet
The following steps explain how to add an additional subnet in the CloudVPN router.
- Open the CloudVPN Portal Fleet Manager app, which is accessible from the Apps menu
 in the top right corner if you are currently in a different CloudVPN Portal app.
 - Open the main menu
 , go to Devices
  , and select the concerning device.
 - Expand the Network
 options and go to [LAN].
 - Click on [Add additional subnet] in the "Additional subnet"-section.
- Enter the requested information (details below) and click on [Add].
| Field | Description |
|---|---|
| Network address | The additional subnet's IP range with a 0 as final number (e.g. 192.168.200.0). |
| Network mask | The additional subnet's network mask (usually 255.255.255.0). |
| Gateway address | The machine's IP address, which is functioning as gateway, that's in the same IP range as the CloudVPN router (e.g. 192.168.140.10). |
You have now made the changes in the CloudVPN Portal, but these are not yet active in your device. You will need to push your changes to your device for them to take effect.
- Click [Push config to device] in the top right corner.
Additional subnet added
If you are already connected to the CloudVPN router, you will need to reconnect. If you are unable to access the additional subnet, make sure your machine meets the requirements mentioned in this guide's introduction.
Comments
0 comments
Please sign in to leave a comment.